
Although most humeral shaft fractures that require surgery are usually
treated with plating, there remains a quiet optimism that newer
approaches and implants for humeral nailing will lower the complication
rate and thereby improve healing rates and patient outcomes.
extremity (tibia and femur) and the humerus narrow the indications for
humeral nailing. The medullary canals of the femur and tibia extend
distally into their respective metaphyses. In contrast, the humeral
canal ends at the metaphysis. The isthmus of the femur is at the
junction of the proximal and middle thirds, while the isthmus of the
humerus is at the junction of the middle and distal thirds of the bone.
The bone at the distal end of the medullary canals of the femur and the
tibia is soft, metaphyseal bone, whereas the distal bone of the humeral
canal is hard, diaphyseal bone. These anatomic differences highlight
the need for newer design features and technologies for humeral nails
that will differentiate them from tibial and femoral nails.
antegrade (from the shoulder) nailing have limited its application.
Shoulder pain following antegrade nailing may be unresolvable and has
many similarities to anterior knee pain associated with tibial nailing.
Nonunions associated with antegrade humeral nailing appear to be unique
and more recalcitrant than those caused by other treatment methods (2).
Furthermore, the humerus, unlike the tibia or femur, does not tolerate
distraction at the fracture site. These formidable challenges with
antegrade nailing are not resolved using standard approaches and
available implant technology.
invasive, can be done relatively quickly, and avoids the morbidity of
extensive incisions. Because antegrade nailing has many potential
complications, retrograde (from the elbow) nailing may be an attractive
option for some patients. This chapter will review the techniques of
both retrograde and antegrade nailing, detail possible complications,
and provide a rationale for clinical application of these techniques.
either from the shoulder or the elbow. These two approaches enable the
surgeon to nail diaphyseal fractures from the proximal fourth to the
distal fourth of the humerus. The approach chosen should be based on
Küntscher’s principle of nailing from an insertion site as far from the
fracture site as possible. Proximal shaft fractures should be nailed in
a retrograde fashion; conversely, distal shaft fractures should be
nailed in an antegrade fashion. Midshaft fractures may be approached
from either end of the humerus. In adults, interlocking nailing is
preferred over flexible nailing, which is occasionally used in
pediatric fractures.
retrograde approaches. The type of the fracture and its location, as
well as overall condition of the patient, must be understood for
selection of the correct approach and implant.
humerus are displaced transverse fractures of the diaphysis, segmental
fractures, floating elbow injuries, pathologic fractures, fractures
associated with thermal burns, and fractures in the polytrauma patient.
A pathologic or impending pathological fracture may be the overall best
indication for humeral nailing. Relative contraindications to
intramedullary nailing include open fractures, fractures with
associated radial-nerve palsy, long spiral fractures, open epiphyses, a
narrow intramedullary canal, and prefracture deformity of the humeral
shaft.
the circumstances and mechanism of injury should be obtained. The arm
should be carefully examined for neurovascular injuries. In general,
intramedullary nailing should be avoided with open humeral fractures
with or without obvious nerve palsy. Open humerus fractures are
notorious for radial nerve interposition or laceration (3).
Patients who are unable to cooperate with a neurological examination
because of a head or spinal cord injury generally should undergo an
open plating procedure with radial nerve exploration
lateral views of the entire humerus. Because the arm should not be
manually rotated through the fracture site in an attempt to obtain a
lateral view, a transthoracic lateral is the preferred view. The
diameter of the medullary canal size, canal length, and anterior
deviation of the distal canal are measured on the lateral radiograph (4).
Intramedullary canal sizes vary among patients, and therefore, these
measurements provide an estimate for the dimensions of the nail.
Measurements can be performed either manually or with a digital
radiography system. The anterior deviation or distal humeral offset is
visualized preoperatively to determine the relationship between the
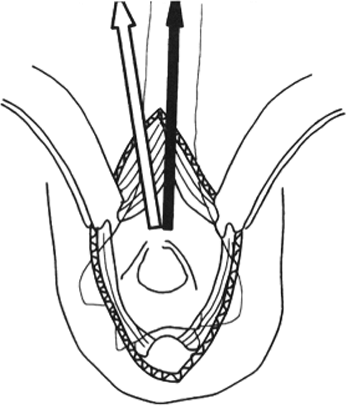
alignment of the humeral canal and the entry portal (Fig. 6.1) (4).
With a small anterior deviation (distal humeral offset), the entry
portal for retrograde nailing should be more distal and include the
superior border of the olecranon fossa, which will require a longer
bony defect. Conversely, if the anterior deviation (humeral offset) is
large, the entry portal will need to be more proximal and will likely
require a smaller length portal. The entry portal is usually 1.5 to 2.0
cm proximal to the olecranon fossa. Smaller canals require smaller
nails and may be more susceptible to iatrogenic comminution.
Multiplanar computed tomography (CT) can be helpful if there is any
suspicion of fracture extension or a second fracture at a different
level. Once adequate films are taken, the arm should be immobilized in
a coaptation splint and sling (Fig. 6.2). The
two most important preoperative decisions regard (a) whether a
retrograde or an antegrade approach is indicated, and (b) if a
retrograde approach is selected, the appropriate starting point as
based on the patient’s anatomy. The majority of displaced closed
fractures can be surgically addressed in the first 10 days after injury.
 |
|
Figure 6.1.
The anterior deviation or distal humeral offset must be appreciated to determine the linear relationship between the humeral canal and the distal, humeral, entry portal. The entry portal to the humeral canal can then be precisely placed in line with the humeral shaft. (From Lin J, Hou SM, Inoue N. Anatomic considerations of locked humeral nailing. Clin Orthop Relat Res 1999;368:247–254
, with permission.) |
 |
|
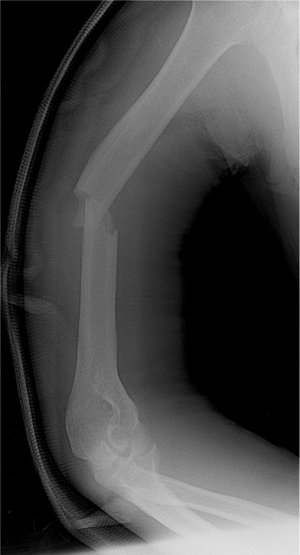
Figure 6.2. Preoperative radiograph of a diaphyseal fracture of the humerus.
|
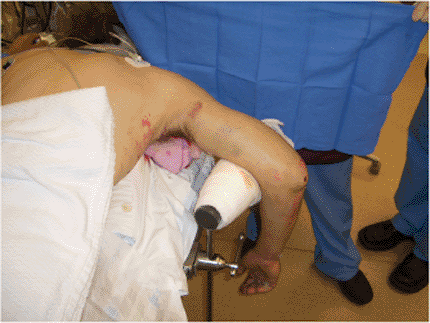
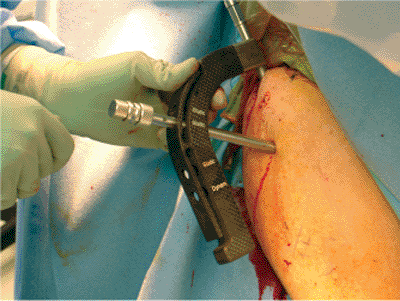
antibiotics are given, and the patient is positioned either in the
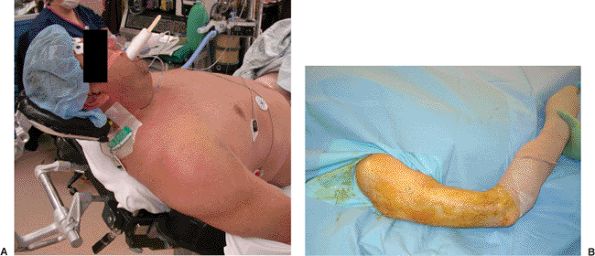
lateral decubitus or prone position. We prefer the prone position (Fig. 6.3)
and have found that an upper paint-roller type support is helpful in
preventing traction injury to the brachial plexus, facilitating access
to the olecranon fossa, and holding the arm in approximately 80 degrees
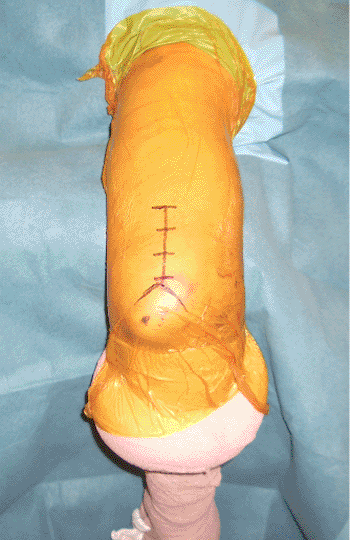
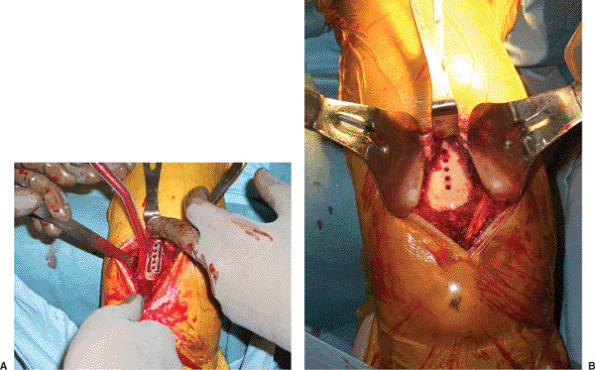
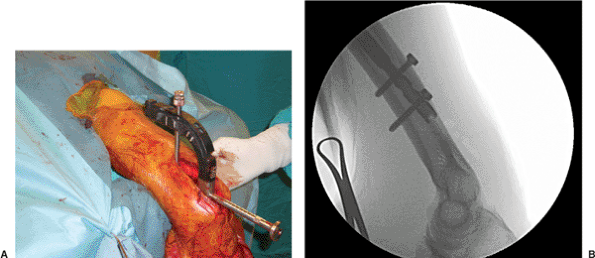
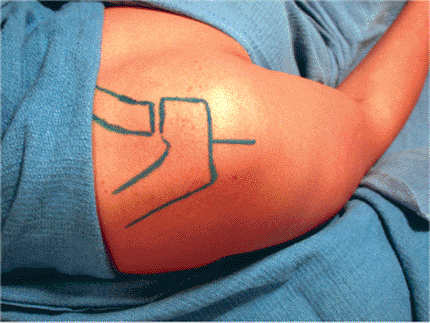
of abduction. A 6-cm posterior incision, starting from the olecranon,
is made in line with the humeral shaft (Fig. 6.4). The triceps tendon is split in line with its fibers and carried directly down to bone (Fig. 6.5).
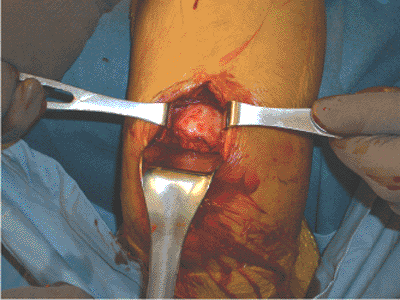
The olecranon fossa is identified and cleared of muscle with an
elevator. The starting point for entry into the medullary canal must be
individualized based on the anatomy of the distal humerus in the
coronal plane and adjusted more proximally or distally, as previously
described. The axis of the humerus is also in line with the lateral
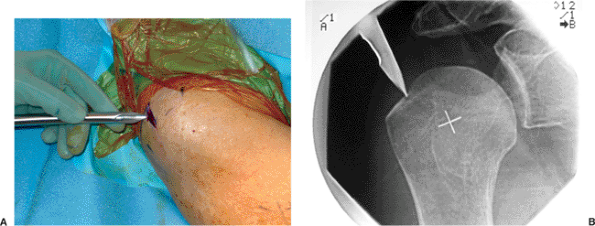
aspect of the olecranon fossa (Fig. 6.6). Using a drill guide, multiple, small, drill holes are made (Fig. 6.7)
that outline the entry portal directly in line with the shaft of the
humerus. These holes are then connected with a large drill bit and
small rongeur to create an oval hole (Fig. 6.8).
A router can also be used to enlarge the entry portal. Reduction of the
fracture usually involves gentle traction on the distal humerus and
correction of the coronal plane displacement (varus-valgus rotation). A
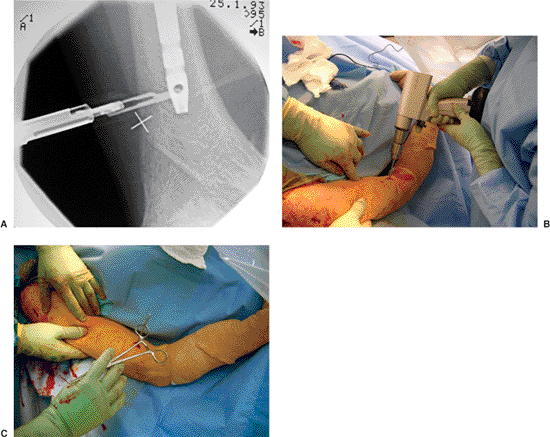
ball-tip guide wire is inserted across the fracture site and confirmed
fluoroscopically (Fig. 6.9A) and the canal is sequentially reamed up to an appropriate diameter, usually 1.0 to 1.5 mm
greater than the size of the nail (Fig. 6.9B). While reaming the canal, the surgeon must stay in line with the humeral shaft.
 |
|
Figure 6.3. The patient is positioned in the prone position with the elbow flexed over the side of the table.
|
 |
|
Figure 6.4. The skin incision is made for the entry portal from the tip of the olecranon to a point 6 cm proximal to the olecranon fossa.
|
 |
|
Figure 6.5. The exposure of the posterior humerus involves a triceps-splitting approach.
|
 |
|
Figure 6.6.
The axis of the humerus is usually in line with the lateral aspect of the olecranon fossa. This relationship should be used to place the entry portal in line with the humeral shaft. (From Lin J, Hou SM, Inoue N. Anatomic considerations of locked humeral nailing. Clin Orthop Relat Res 1999;368:247–254
, with permission.) |
 |
|
Figure 6.7. The entry portal is established using a (A) drill guide to drill (B) five collinear pilot holes.
|
 |
|
Figure 6.8. A. The collinear holes are enlarged and (B) connected using a large drill to establish a long, oval, entry portal.
|
 |
|
Figure 6.9. A. The guide wire is introduced by hand and (B) the fracture reduction is maintained while reaming.
|
 |
|
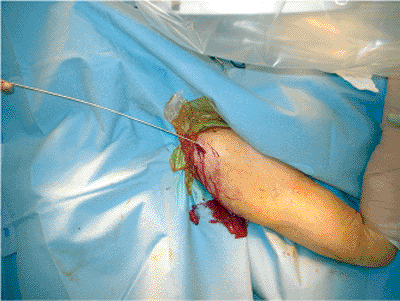
Figure 6.10. The nail is gently inserted by hand.
|
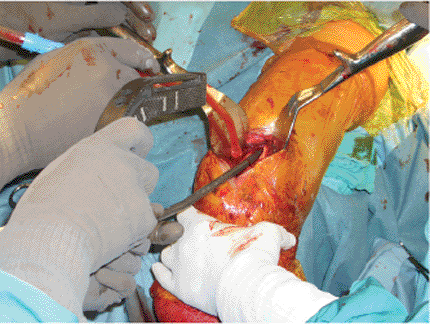
Forceful insertion may cause comminution of the fracture site or an
iatrogenic supracondylar fracture. Distal locking is usually performed
in a posterior-to-anterior direction (Fig. 6.11).
After distal interlocking, the fracture should be compressed by gently
tapping the insertion hand bolt with a mallet. Fracture distraction
after nail insertion must be avoided. Proximal locking is performed
from the posterior-to-anterior direction; a suture can be used as a
safety line for retrieving a misplaced screw (Fig. 6.12).
After the skin is incised over the screw hole, the soft tissues must be
spread down to the bone with a hemostat to prevent injury to the
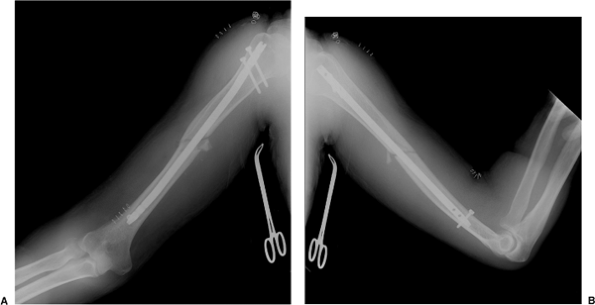
axillary nerve. After radiographs are obtained in the operating room (Fig. 6.13), formal repair of the triceps tendon is performed and the skin is closed in a routine fashion.
retrograde flexible nailing. This technique provides an option for
exceptionally small intramedullary canals or resource-limited
environments. This procedure may be performed from either a central
portal above the olecranon fossa or through separate medial and lateral
epicondylar portals. Multiple small-diameter nails are required to fill
the canal. Postoperatively, fracture
bracing
is usually required to protect against rotational forces. A common
complication with this procedure is flexible nail migration, which
usually requires implant removal after fracture healing.
 |
|
Figure 6.11. A. The nail is interlocked distally using the guide and (B) fluoroscopy.
|
 |
|
Figure 6.12. A. An absorbable suture can be placed around the screw as a safety line for (B) proximal interlocking.
|
 |
|
Figure 6.13. A. Postoperative AP and (B) lateral radiographs after retrograde nailing.
|
endotracheal tube brought out toward the side opposite the humeral
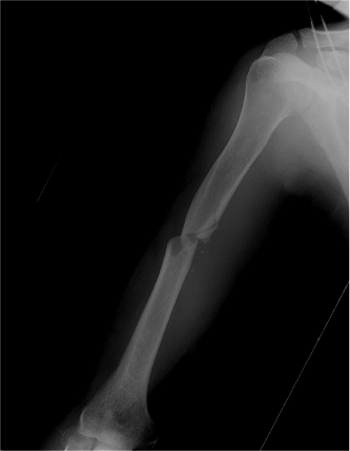
fracture. Preoperative antibiotics are given. Injury radiographs are
available in the operating room (Fig. 6.14).
The patient is positioned in a modified beach-chair position on a
radiolucent operating table. A Mayfield headrest (Schaerer Mayfield
USA, Inc., Cincinnati, OH) is invaluable because it facilitates the
attainment of an intraoperative axillary view (Fig. 6.15).
A small roll is placed between the scapulas, and the head is rotated
toward the contralateral shoulder. The operative extremity should be
draped free for reduction and imaging. The base of the c-arm is
positioned at the foot of the bed, parallel to the operating table.
This allows for AP and lateral imaging. Prior to prepping and draping,
multiple fluoroscopic views should be obtained to confirm adequate
visualization of the starting point as well as the fracture. The skin
should be prepped sterilely from the hand to include the shoulder,
chest, and neck.
humeral head diameter is palpated from anterior to posterior to locate
the midline. A 3-cm longitudinal incision is made from the edge of the
acromion and carried distally (Figs. 6.16 and 6.17).
The deltoid muscle is split in line with its fibers. The subacromial
bursa is cleared bluntly with finger dissection. An incision is made in
line with the fibers of the supraspinatus tendon, and the tendon edges
are retracted. The correct starting point is critical. A curved awl is
used to initiate the starting point just medial to the greater
tuberosity and posterior to the bicipital tuberosity (see Fig. 6.17A). Adduction of the arm and extension of the shoulder will improve
clearance of the acromion and facilitate awl access to the correct
portal location. The awl is advanced into the intramedullary canal.
Satisfactory position of the awl is confirmed fluoroscopically (see Fig. 6.17B).
 |
|
Figure 6.14. Preoperative AP radiograph before antegrade humeral nailing.
|
 |
|
Figure 6.15. A.
The patient is positioned supine eccentrically on the operating table, in a modified beach-chair position, with a Mayfield Headrest System table extension. B. The arm is draped free. |
combination of adduction (arm against chest), neutral forearm rotation
(forearm straight up toward ceiling), and traction. An assistant is
necessary to maintain this reduction during reaming and nail insertion.
A fracture gap should be avoided when nailing due to the potential of
iatrogenic injury to the radial nerve. A ball-tipped guide wire,
visualized via fluoroscopy, is inserted and passed down the medullary
canal (Fig. 6.18). A small bend placed in the
end of the guide wire allows for directional changes as the wire is
advanced across the fracture site. Reaming is performed in 0.5-mm
increments until 1.5 mm of cortical chatter is achieved. The nail is
securely attached to the alignment and driving guide. An exchange tube
may be used to replace the ball-tipped guide wire for a smaller, smooth
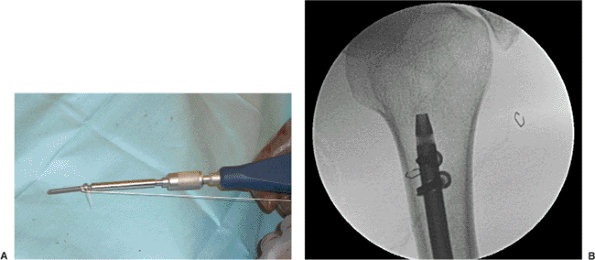
wire with some nailing systems (Fig. 6.19). For solid nails, the reduction is
held firmly, the guide wire is removed, and the nail is carefully
inserted by hand. The length of the nail should be carefully chosen. If
measurements of the nail, made by the guide wire, show that the nails
are in-between standard sizes, then the shorter size should be
selected. The nail can bind in the distal canal and make countersinking
difficult. The nail is driven below the cortical surface of the humeral
head to prevent subacromial impingement and rotator cuff irritation.
Multiple fluoroscopic images of the arm in various positions must be
obtained to confirm that the nail is below the horizon of the humeral
head and adequately countersunk. Fracture distraction after nail
insertion should be avoided. The fracture can be compressed after
proximal interlocking by tapping the insertion bolt with the mallet.
 |
|
Figure 6.16. The skin incision is marked over the lateral aspect of the shoulder.
|
 |
|
Figure 6.17. A. The entry site to the intramedullary canal is made with the cannulated awl. B. The entry site is verified fluoroscopically.
|
 |
|
Figure 6.18. The guide wire is passed.
|
 |
|
Figure 6.19. A. The nail is gently introduced by hand and (B) brought across under fluoroscopic control.
|
mark the skin for small stab incisions used to insert the proximal
interlocking screws. The soft tissues are gently spread down to bone
using a hemostat to ensure a safe screw path. The drill sleeve and
trocar are inserted through the guide (Fig. 6.20)
and advanced to bone with gentle taps from a mallet. Interlocking
screws of the appropriate length are inserted after drilling and
measuring. Oblique screws that course proximal-lateral to distal-medial
are preferred because the insertion point is cephalad to the axillary
nerve. Nonetheless, lateral screws that are very proximal can cause
impingement when the arm is fully elevated.
distal interlocking is performed. A freehand technique is used to
target the distal interlocking screws. Distal interlocking screws
inserted from an anterior-to-posterior direction are preferred because
they avoid the radial nerve, which is more lateral. However, the
surgeon must work only in the middle of the distal humerus in the
coronal plane to avoid the brachial artery and vein. Adequate
fluoroscopic images (perfect circles) of the distal, interlocking,
screw holes are critical. Under fluoroscopy, a scalpel is placed over
the skin to locate precisely the incision (Fig. 6.21A).
An incision is made and a blunt hemostat is used to spread the
brachialis muscle down to the bone. A short drill bit is useful to
assist imaging under the c-arm, and based on an orthogonal view, the
drill bit is centered in the locking hole. The drill bit is positioned
perpendicular to the nail and the near cortex is drilled (Fig. 6.21B).
The drill bit is detached from the drill and advanced through the nail
up to the far cortex with gentle taps from a mallet, and satisfactory
position of the drill bit is verified (Fig. 6.21C).
The drill is then reattached to the drill bit and the far cortex is
drilled. The bone at this level is fairly dense. The distal screws are
usually 24 mm long. When placing these screws through a thick
soft-tissue envelope, the surgeon should tie an absorbable suture to
the screw so that if the screw becomes dislodged from the screwdriver
it will not be displaced in the soft tissues. Final AP and lateral
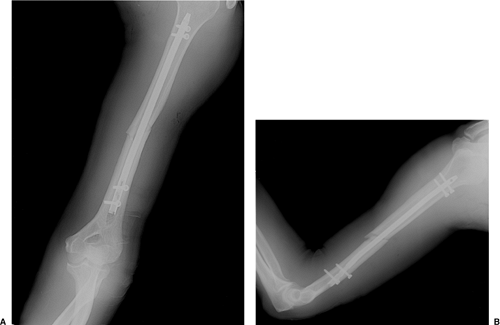
radiographs (Fig. 6.22) are taken in the operating room.
 |
|
Figure 6.20. The nail is interlocked proximally using the guide.
|
using nonabsorbable sutures. The deltoid raphe is also repaired. The
skin and subcutaneous tissues are closed in a routine fashion.
 |
|
Figure 6.21. A. Distal interlocking is performed after the incisions are precisely placed under fluoroscopic control. B. A freehand technique is used, and (C) the position of the unchucked drill bit in the screw hole is verified.
|
the end of surgery. The postoperative dressing is removed after 2 days
and gentle shoulder pendulum and elbow range-of-motion exercises are
initiated. Postoperative rehabilitation is tailored to the method of
nailing, fracture stability, and overall patient health. After
antegrade nailing, patients commonly have shoulder symptoms; whereas
after retrograde nailing, patients often have elbow symptoms. Patients
are seen at 2 weeks for suture removal, with subsequent follow-up at 4-
to 6-week intervals.
limited to gentle passive motion by the patient. A sling is routinely
used for the first 4 to 6 weeks after surgery. Formal physical therapy
is not necessary, but the range-of-motion and shoulder pendulum
exercises are required to prevent stiffness and loss of elbow
extension. Large rotational stresses to the arm are avoided until
radiographic evidence shows healing. Nail removal after healing is
usually not required. However, if implant or soft-tissue irritation
develops, the nail may be removed.
 |
|
Figure 6.22. A. Final AP and (B) lateral radiographs after antegrade nailing.
|
appear to be unique and more recalcitrant than humeral nonunions caused
by other treatment methods. It is logical to assume that nonunion rates
are similar for antegrade and retrograde nailing. However, in 2005,
Court-Brown (5) reported nonunion rates of
11.6% for antegrade nailing and 4.5% rates for retrograde locked
nailing. Nonunions after humeral nailing require nail removal followed
by plate osteosynthesis with bone grafting. Unlike long bone nonunions
in the femur or tibia, which respond well to exchange nailing, humeral
diaphyseal nonunions rarely heal following renailing (2).
When nails loosen or fatigue in conjunction with a nonunion, bone loss
and cortical erosion are significant and complicate subsequent internal
fixation. Most nonunions require exposure of the fracture site through
an open approach, followed by debridement of the fracture site,
osteosynthesis, and insertion of a bone graft.
approximately 1% to 2% of cases. Infected humeral nails can be treated
in a similar fashion to infected nails of the tibia and femur.
Antibiotic-impregnated cement nails can be made with cement, powdered
antibiotics, a chest tube, and an Ender nail. The cement is mixed with
the antibiotics and injected into a small diameter (20–22 French) chest
tube (approximately 6.7 to 7.3 mm), which is used as a mold. An Ender
nail of appropriate length is then inserted in the middle of the
cement. The eyelet of the Ender nail is left out of the end of the nail
to allow for future removal of the antibiotic nail. After the cement
hardens, the chest tube is incised in two areas over the length of the
nail. The chest tube is then peeled off like a banana peel. These
antibiotic nails can provide mechanical stability while delivering high
local concentrations of antibiotics. To our knowledge, septic shoulders
or septic elbows as a result of infected humeral nails have not been
reported. Insertion site problems are the most common complication
after intramedullary nailing.
shoulder pain and loss of motion. If the nail is proud, subacromial
impingement and rotator cuff irritation are universal. Even when the
nail is buried beneath the cortical surface, shoulder pain can be a
problem. Meticulous repair of the rotator cuff after nail insertion may
decrease shoulder pain.
Iatrogenic fractures at the insertion site can also occur with antegrade nailing and occurs in 5.1% of cases (5).
and loss of elbow extension. Elbow pain appears to be caused by triceps
tendon irritation or posterior elbow impingement. Iatrogenic
comminution of the fracture site and/or supracondylar fracture at the
insertion site reportedly occurred in 7.1% of retrograde nailing cases (5). These problems are not always of clinical significance.
potential injury from humeral nailing to neurovascular structures into
three areas: (a) risk to the radial nerve in the spiral groove from
canal preparation and nail insertion; (b) risk to the axillary nerve
from proximal interlocking; and (c) risk to the radial musculocutaneous
and medial nerves, as well as brachial artery from distal interlocking.
The potential for nerve injury in the spiral groove can be decreased by
avoiding gap reductions and reaming in areas of comminution. The main
trunk of the axillary nerve has been previously reported to be at risk
with proximal screws placed in an anterior-to-posterior direction (6).
In retrograde nailing, the axillary nerve is also at risk with proximal
interlocking in a posterior-to-anterior direction. The axillary vessels
are not at risk unless the drill penetrates several centimeters past
the medial cortex (6). If a patient loses
radial nerve function after humeral nailing, some surgeons advocate
return to the operating room for exploration of the radial nerve. As an
alternative, many surgeons favor observation for 3 to 4 months because
many nerve palsies recover spontaneously.
to the acromion at the lateral aspect of the humerus, where the
axillary nerve arborizes, may also be injured from lateral-to-medial
directed screws. Distal interlocking from a lateral-to-medial direction
places the radial nerve at risk, while anterior-to-posterior or
posterior-to-anterior interlocking places the medial and
musculocutaneous nerves (especially the lateral antebrachial-cutaneous
nerve) and brachial artery at risk. As a general rule, soft tissues
should be spread down to the bone with a hemostat prior to drilling
holes for any interlocking screws.
site are also potential complications after intramedullary nailing of
the humerus. The risk of fracture site distraction appears to be
greater with antegrade nailing than with retrograde nailing.
Comminution of the fracture after reaming is usually related to
extension and propagation of radiographically occult secondary-fracture
lines. Smaller humeral canals and larger diameter nails appear to
increase the risk of iatrogenic comminution from nailing.
BL, D’Ambrosia R. The risk of injury to the axillary nerve, artery, and
vein from proximal locking screws of humeral intramedullary nails. Orthopedics 1992;15(6):697–69.9